How to Measure a Room for Flooring in 5 Minutes
The right way to sketch, measure, and sum square footage for irregular rooms.
Accurate measurements are the bedrock of any successful flooring project. Miscalculations can lead to either costly material shortages or wasteful overspending on surplus. This guide simplifies the process, ensuring you gather precise figures with minimal effort. We will cover straightforward techniques for various room shapes, helping you confidently estimate your material needs. By following these steps, you can prepare effectively for your new flooring installation.
Gather Your Essential Tools
Before you begin, gather a few basic items. A reliable tape measure, ideally one that can extend at least 25 feet, is crucial. You'll also need a pen or pencil, a notepad or graph paper for sketching, and a calculator for summing your measurements. For larger rooms, an assistant can be helpful to hold the end of the tape measure, ensuring straight and accurate readings.
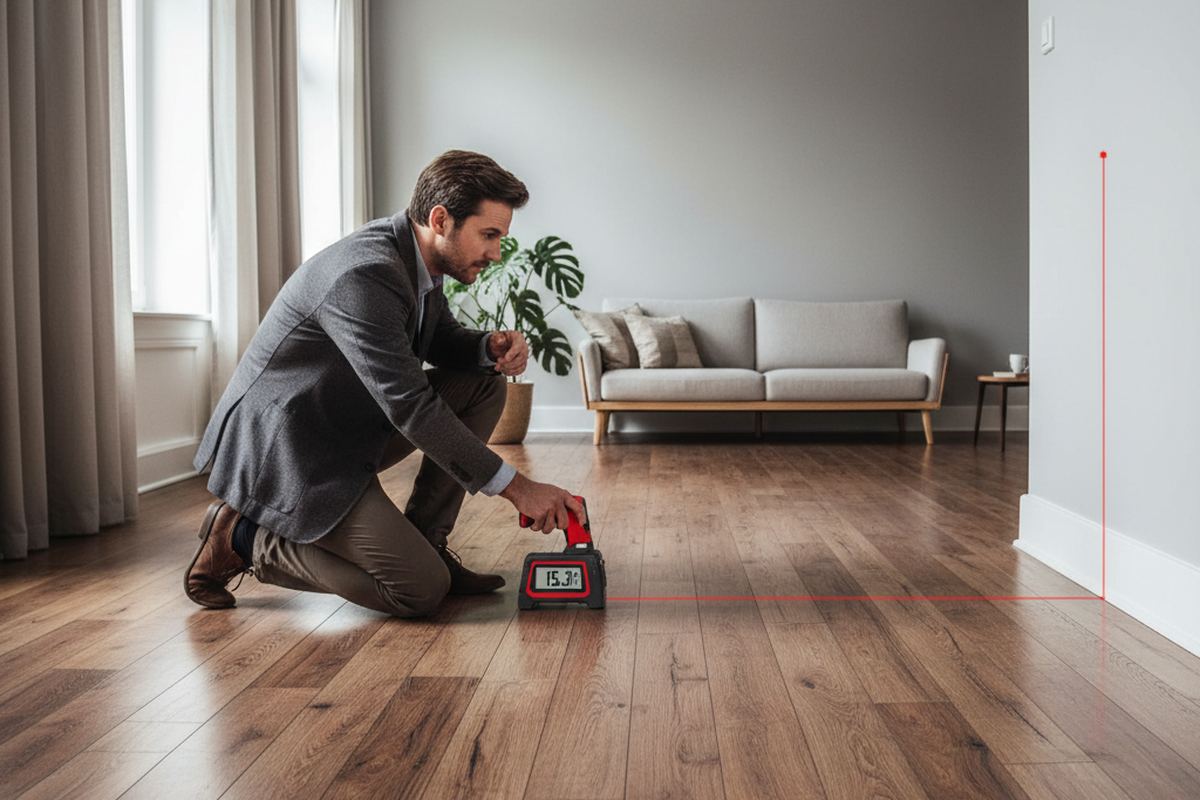
Consider using a laser measure for enhanced precision, especially in long or irregularly shaped rooms. While not strictly necessary, it can significantly speed up the process and minimize human error. Ensure your tape measure is in good working order, with clear markings and a sturdy hook, to prevent misreads that could impact your material order.
Sketch Your Room Layout
Start by creating a simple diagram of your room. Don't worry about artistic perfection; the goal is a functional representation. Draw each wall and note any permanent fixtures like cabinets, islands, or fireplaces that will not be covered by flooring. This visual aid helps organize your measurements and prevents overlooking any sections.
For rooms with alcoves or protrusions, sketch these details accurately. Break down complex shapes into simpler rectangles or squares within your sketch. Label each section clearly, as this will be vital when you begin taking individual measurements and calculating area later.
Measure Basic Rectangular and Square Rooms
For a standard rectangular or square room, measure the length of two perpendicular walls. Take measurements from wall to wall, ignoring baseboards, as the new flooring will typically extend underneath or up to them. Always measure at multiple points along the length and width to account for slight variations in wall straightness, using the largest measurement for each dimension.
Multiply the length by the width to calculate the square footage. For example, if a room is 12 feet long and 10 feet wide, the area is 120 square feet (12 ft x 10 ft). Double-check your measurements to confirm accuracy; even small errors can accumulate into significant material discrepancies.
Estimate flooring cost by square footage and material — with waste factor and install labor baked in.
Open the Flooring Cost CalculatorTackle Irregularly Shaped Spaces
Rooms with L-shapes, alcoves, or multiple angles require a slightly different approach. The most effective method is to divide the irregular space into several smaller, manageable rectangles or squares. Measure each of these subsections individually, calculating their respective square footage.
Once you have the square footage for each smaller section, sum them together to get the total area of the room. For instance, an L-shaped room can be viewed as two rectangles joined together. Measure and calculate the area of Rectangle A, then Rectangle B, and add them for the total square footage. This systematic breakdown simplifies complex layouts.
Account for Obstacles and Waste Factor
Remember to measure around any obstacles that will not receive flooring, such as built-in cabinets or hearths. If these areas are significant, subtract their square footage from your total. For example, a kitchen island measuring 3 feet by 6 feet would be 18 square feet to subtract from the kitchen's total area.
Always add a waste factor to your total square footage. This accounts for cuts, mistakes, and future repairs. A common recommendation is to add 5-10% for standard rooms and up to 15-20% for rooms with many angles, patterns, or if you are installing a challenging material. For a 200 square foot room, adding 10% means ordering 220 square feet of material.
- Standard rooms: 5-10% waste factor
- Complex designs or patterns: 10-15% waste factor
- Highly irregular rooms or first-time DIYers: 15-20% waste factor
Convert to Box Quantities and Review
Flooring materials are typically sold in boxes, with each box covering a specific number of square feet. Once you have your total square footage (including waste factor), divide this number by the square footage per box to determine how many boxes you need. Always round up to the nearest whole box to ensure you have enough material.
For example, if you need 220 square feet of flooring and each box covers 25 square feet, you would need 220 / 25 = 8.8 boxes. Rounding up, you would purchase 9 boxes. Review all your measurements and calculations one final time before placing your order. A quick double-check can save significant time and money.
The bottom line
Accurate room measurements are a critical first step in any flooring project, laying the groundwork for a smooth installation. By following these clear, step-by-step instructions, you can confidently determine the precise amount of material required. This careful preparation minimizes waste, prevents delays, and ultimately contributes to a successful and satisfying home improvement.
Get more guidance like this in your inbox
Weekly emergency-fund tactics, milestone checklists, and the next article — delivered free.
Run your own number
Get a personalized emergency fund target based on your income, expenses, and job stability.
Open the calculator