Full Lawn Renovation with Seed: The 30-Day Plan
A complete 30-day plan to kill, till, seed, and grow a new lawn from bare dirt.
Transforming a struggling lawn into a vibrant green space is a rewarding project that adds value and curb appeal to your home. A full lawn renovation, though demanding, allows you to address underlying issues and establish a healthy foundation. This comprehensive 30-day plan guides you through the critical steps, from preparing the soil to nurturing new growth, ensuring a successful outcome for your efforts. Following these steps diligently will set your lawn up for long-term health and beauty.
Day 1-7: Eliminate Existing Grass and Weeds
The first step in a full lawn renovation is to completely remove all existing vegetation. This ensures you start with a clean slate, free from competing grasses and weeds. A non-selective herbicide containing glyphosate is typically the most effective method for this, applied according to manufacturer instructions. For best results, choose a calm, dry day with temperatures between 60-85°F. Plan for at least 3-5 days after application for the vegetation to fully die back.
Alternatively, for an organic approach or smaller areas, you can solarize the lawn. This involves covering the area with clear plastic sheeting for 4-6 weeks during the hottest part of summer, allowing the sun's heat to kill off plants and weed seeds. Another manual option is to remove sod with a sod cutter, though this is labor-intensive and may not eliminate all weed seeds. Regardless of the method, ensure all dead plant material is thoroughly raked and removed before proceeding.
Day 8-14: Soil Testing and Amendment
Understanding your soil's composition is crucial for successful seeding. After clearing the area, take several soil samples from different spots across your lawn and send them to a local extension office or use a reputable home testing kit. A soil test will reveal your soil's pH (ideal range for most grasses is 6.0-7.0) and nutrient deficiencies (nitrogen, phosphorus, potassium). This information is vital for selecting appropriate amendments.
Based on your soil test results, incorporate necessary amendments. If your pH is too low, add agricultural lime; if too high, add elemental sulfur. For nutrient deficiencies, apply starter fertilizer or organic compost. Spread amendments evenly over the entire area and then till the soil to a depth of 4-6 inches. This aeration improves drainage, root penetration, and mixes in amendments effectively.
Day 15-18: Final Grading and Seedbed Preparation
After tilling and amending, it's time to refine the soil surface. Rake the tilled area thoroughly to break up any large clods, remove rocks, and smooth out bumps. Aim for a fine, crumbly soil texture. This step is critical for ensuring good seed-to-soil contact, which is essential for germination. Create a slight slope away from your home's foundation to promote proper water drainage.
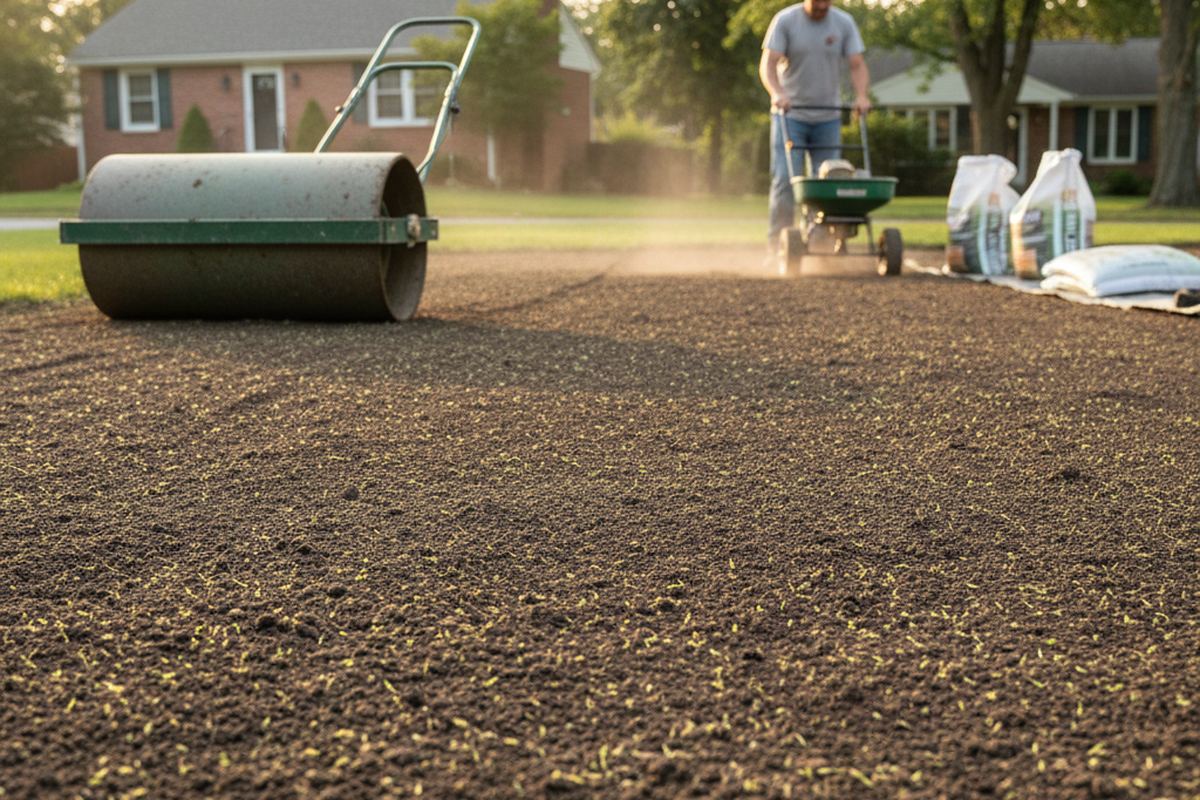
Once the surface is smooth, use a lawn roller to lightly firm the seedbed. You should be able to walk across it without sinking more than an inch. This light compaction helps prevent seeds from washing away and ensures a stable base. However, avoid over-compacting, as this can hinder root development. The goal is a firm but not hard surface.
Get the exact pounds of seed you need for your lawn size, grass type, and overseeding vs new lawn.
Open the Lawn Seed CalculatorDay 19-20: Seed Application and Initial Watering
Choose a high-quality grass seed blend appropriate for your climate and sun exposure. For example, in northern climates, a mix of Kentucky Bluegrass, Perennial Ryegrass, and Fine Fescue is common. In southern climates, Bermuda, Zoysia, or St. Augustine are popular. Apply the seed evenly using a broadcast spreader for larger areas or a drop spreader for more precise application. Refer to the seed bag for the recommended seeding rate, typically ranging from 3-5 pounds per 1,000 square feet for new lawns.
After seeding, lightly rake the area to ensure the seeds are barely covered with about 1/8 to 1/4 inch of soil. Avoid burying them too deeply. Follow this with another light pass with the lawn roller to press the seeds firmly into the soil, maximizing seed-to-soil contact. Immediately after seeding, water the area gently but thoroughly, ensuring the top inch of soil is moist without creating puddles or washing away seeds.
Day 21-28: Consistent Watering for Germination
The most critical factor for successful germination is consistent moisture. For the first 7-10 days after seeding, you will need to water frequently – typically 2-4 times a day – with short, light applications. The goal is to keep the top 1-2 inches of soil consistently moist, not saturated. Avoid heavy watering that can dislodge seeds or lead to runoff. The exact frequency will depend on temperature, humidity, and sun exposure.
As sprouts begin to emerge (usually within 7-21 days depending on seed type), you can gradually reduce the frequency of watering but increase the duration. Transition to watering once or twice a day, ensuring the soil is moist to a depth of 3-4 inches. Continue to monitor the soil moisture closely, adjusting your schedule as needed. Avoid letting the new seedlings dry out, as this can quickly kill them.
Day 29-30: First Mowing and Ongoing Care
Once your new grass reaches a height of 3-4 inches, it's time for its first mowing. Ensure your mower blades are sharp to avoid tearing the tender new grass. Set your mower to its highest setting, typically 2.5-3.5 inches, and only remove the top one-third of the grass blade. Avoid mowing when the grass is wet, as this can lead to clumping and disease.
After the first mow, gradually transition to a less frequent, deeper watering schedule. Aim for 1-2 inches of water per week, applied in fewer, longer sessions to encourage deep root growth. Avoid applying herbicides to your new lawn for at least 60-90 days, as they can damage young grass. Fertilize with a starter fertilizer around 4-6 weeks after germination to support continued growth.
The bottom line
A full lawn renovation is a significant undertaking, but by meticulously following this 30-day plan, you can establish a lush, healthy lawn. Patience and consistent attention to watering are key during the critical germination and establishment phases. With proper care, your new lawn will thrive and become a beautiful asset to your home for years to come.
Get more guidance like this in your inbox
Weekly emergency-fund tactics, milestone checklists, and the next article — delivered free.
Run your own number
Get a personalized emergency fund target based on your income, expenses, and job stability.
Open the calculator