8 Common Sod Install Mistakes and How to Avoid Them
The install mistakes that kill sod within 2 weeks — and the pro fixes.
Installing new sod can significantly enhance your home's curb appeal and create a lush, inviting lawn. However, the success of your sod project hinges on meticulous preparation and proper installation. Even small missteps during this crucial period can lead to disappointing results, from patchy growth to complete sod failure. Understanding common pitfalls and how to proactively address them can save you time, money, and the frustration of re-doing your hard work. This guide outlines key mistakes to avoid for a vibrant, healthy lawn.
Insufficient Soil Preparation
One of the most frequent errors in sod installation is neglecting proper soil preparation. Simply laying sod over existing, unamended soil can lead to poor root establishment and stunted growth. The soil beneath your sod needs to be loose, well-draining, and rich in nutrients to encourage roots to penetrate deeply and absorb essential water and nutrients. Compacted or depleted soil will hinder this process, making your new lawn vulnerable to stress.
Before laying any sod, remove all debris, weeds, and old turf. Then, loosen the top 4-6 inches of soil using a tiller or spade. Incorporate organic matter such as compost or well-rotted manure to improve drainage and nutrient content. Test your soil pH; most turfgrasses thrive in a pH range of 6.0 to 7.0. Adjustments with lime or sulfur may be necessary to achieve optimal conditions for healthy root development.
Improper Soil Grading and Leveling
Uneven grading is another significant mistake, often resulting in drainage issues and an unsightly lawn. Low spots can collect water, creating soggy areas that promote disease and hinder root growth, while high spots can dry out quickly, leading to brown patches. A properly graded lawn ensures water flows away from your home's foundation and distributes evenly across the entire area, preventing pooling and erosion.
After amending your soil, carefully grade the area to create a gentle slope away from your house, typically a 1-2% grade. Use a rake or landscape level to ensure a smooth, uniform surface. Fill in any depressions and level out bumps. A well-leveled base not only aids in drainage but also allows the sod rolls to lie flat and make consistent contact with the soil, which is crucial for successful rooting.
Delaying Sod Installation After Delivery
Sod is a living product with a limited shelf life, and delaying its installation can severely compromise its viability. Once harvested, sod begins to rapidly dehydrate and can generate heat, especially when stacked. This stress can lead to yellowing, disease, and even death of the grass blades and roots if not laid promptly. The longer sod sits, the less likely it is to successfully root.
Plan your sod delivery to coincide with your installation readiness. Ideally, sod should be laid within 24 hours of delivery, or even sooner in hot weather. If immediate installation isn't possible, unstack the rolls and lightly mist them with water to help reduce heat buildup and maintain moisture. However, this is only a temporary measure; prompt installation is the best way to ensure the sod remains healthy and vibrant.
Estimate sod pallets, rolls, and total install cost for your yard — with delivery and prep budget.
Open the Sod CalculatorIncorrect Sod Laying Technique
How you lay the sod directly impacts its ability to root and establish a seamless lawn. Gaps between sod rolls or overlapping edges can lead to uneven growth, exposed soil, and increased weed intrusion. If the sod is not pressed firmly against the prepared soil, air pockets can form, preventing roots from making contact and accessing the necessary moisture and nutrients.
Begin laying sod along a straight edge, such as a driveway or sidewalk. Stagger the joints like bricks in a wall to prevent long seams. Ensure each roll is laid snugly against the previous one, without overlapping. Use a sharp utility knife to cut pieces to fit irregular shapes or edges. After laying, use a roller (preferably half-filled with water) or firmly walk over the entire area to ensure good contact between the sod and the underlying soil, eliminating air pockets.
Inadequate Initial Watering
The first few weeks after sod installation are critical for root establishment, and proper watering is paramount. Many homeowners underestimate the amount of water new sod requires, leading to dehydration and failure. The goal is to keep the sod and the top few inches of the underlying soil consistently moist, but not waterlogged, to encourage roots to grow down.
Immediately after laying, thoroughly water the entire area until the sod is saturated and the soil beneath is damp to a depth of 3-4 inches. You can check this by carefully lifting a corner of a sod piece. For the next 7-14 days, water 2-3 times a day, or as needed, to keep the sod moist. Reduce frequency and increase duration as roots begin to establish, aiming for deep, infrequent watering to encourage deeper root growth.
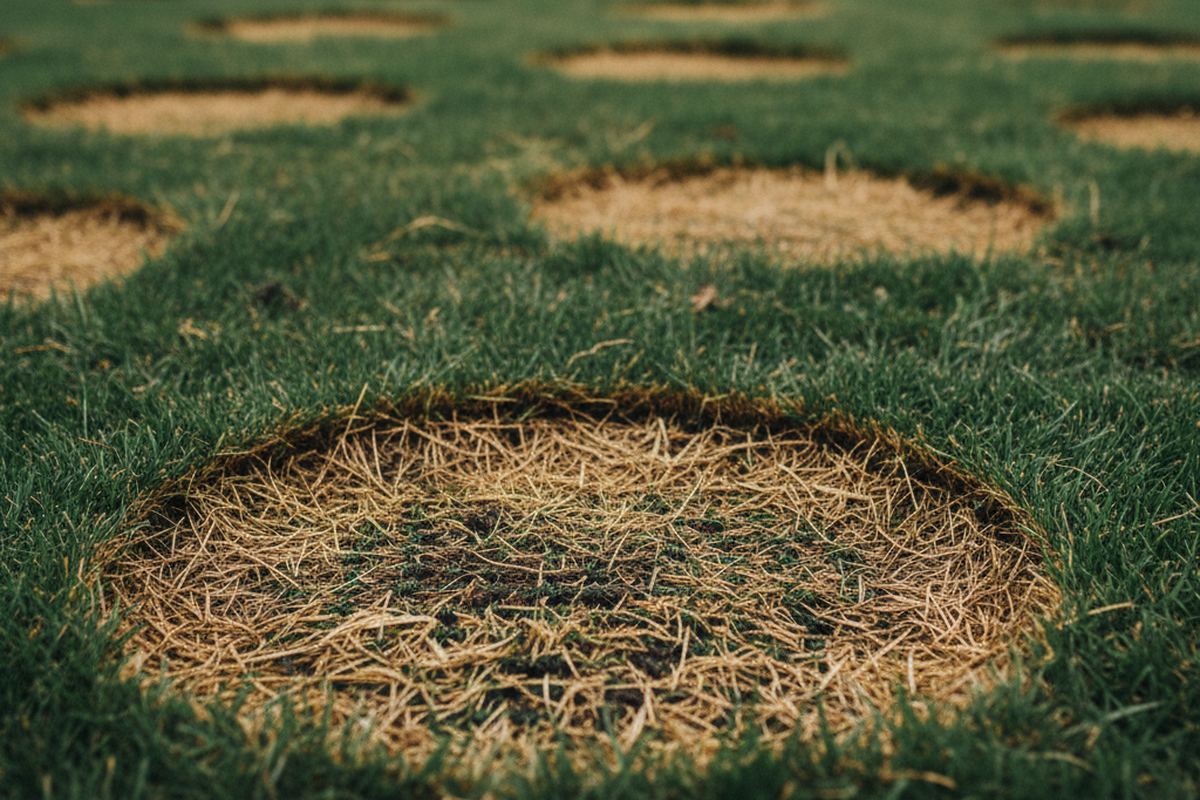
Walking on New Sod Too Soon
While it might be tempting to admire your new lawn up close, walking on newly laid sod too soon can cause significant damage. The delicate root system is still trying to establish itself, and pressure from footsteps can dislodge the sod from the soil, create depressions, and compact the soil, hindering root growth and creating uneven areas. This can lead to patchy growth and a less robust lawn.
Avoid walking on your new sod for at least the first 10-14 days, or until the sod has firmly rooted. To test for root establishment, gently lift a corner of a sod piece. If it resists lifting and feels anchored, it's starting to root. Minimize traffic for the first month. If you must walk on it, do so carefully and only when absolutely necessary, distributing your weight as evenly as possible.
Mowing Too Early or Too Short
The first mow is an important milestone for a new lawn, but doing it too early or cutting the grass too short can stress the nascent root system. Mowing prematurely can pull up unrooted sod pieces, and cutting too much of the blade can shock the grass, diverting energy from root development to blade regrowth. This weakens the plant and makes it more susceptible to environmental stressors.
Wait until the sod has firmly rooted and the grass blades have reached a height of at least 3-4 inches before the first mow. Ensure your mower blades are sharp to make clean cuts. Only remove the top one-third of the grass blade to avoid stressing the plant. For most turfgrasses, maintaining a mowing height of 2.5-3 inches is ideal, promoting denser growth and shading out weeds.
The bottom line
Avoiding these common sod installation mistakes is crucial for establishing a healthy, beautiful lawn that you can enjoy for years to come. By dedicating time to proper soil preparation, careful installation, and consistent aftercare, you set your new sod up for success. Remember that patience and attention to detail during the initial weeks are key to a thriving and resilient turf.
Get more guidance like this in your inbox
Weekly emergency-fund tactics, milestone checklists, and the next article — delivered free.
Run your own number
Get a personalized emergency fund target based on your income, expenses, and job stability.
Open the calculator