8 Mistakes DIY Tile Installers Always Make
Common DIY tile mistakes — from wrong trowel notch to skipping waterproofing — and how to fix them.
Tiling can significantly enhance the look and value of your home, whether it's a kitchen backsplash, a bathroom floor, or an entire room. Many homeowners take on tiling as a DIY project, aiming to save on labor costs. However, without proper planning and attention to detail, common mistakes can turn a rewarding project into a frustrating and costly endeavor. Understanding these pitfalls before you begin can help ensure a professional-looking and durable result.
Skipping Essential Surface Preparation
One of the most frequent errors in DIY tiling is neglecting proper surface preparation. The substrate—the surface onto which the tile is laid—must be clean, dry, flat, and structurally sound. Any dust, grease, old adhesive, or unevenness will compromise the bond of the new tile, leading to cracks, loose tiles, or an uneven finish. Taking the time to properly clean, level, and prime the surface is critical for long-term success.
For floors, this might involve self-leveling compounds to address dips and humps, or installing cement board over wood subfloors. For walls, ensuring the drywall is securely fastened and free of defects is paramount. In wet areas like showers, a waterproof membrane is non-negotiable. Rushing this stage often results in needing to redo the entire project, incurring additional material and time costs.
Incorrect Mortar Selection and Mixing
The type of thin-set mortar you use is not a one-size-fits-all decision. Different tiles—such as porcelain, ceramic, or natural stone—and different applications—like floors, walls, or wet areas—require specific mortar formulations. Using the wrong mortar can lead to poor adhesion or even tile discoloration. For instance, large format tiles often require a medium-bed mortar, while mosaics might need a finer-aggregate thin-set.
Equally important is mixing the mortar correctly. Adding too much or too little water affects the mortar's workability, strength, and adhesion. The consistency should be like peanut butter, holding a ridge when troweled. Over-mixing can introduce too much air, weakening the bond, while under-mixing leaves lumps that prevent full tile contact. Always follow the manufacturer's instructions precisely for optimal results.
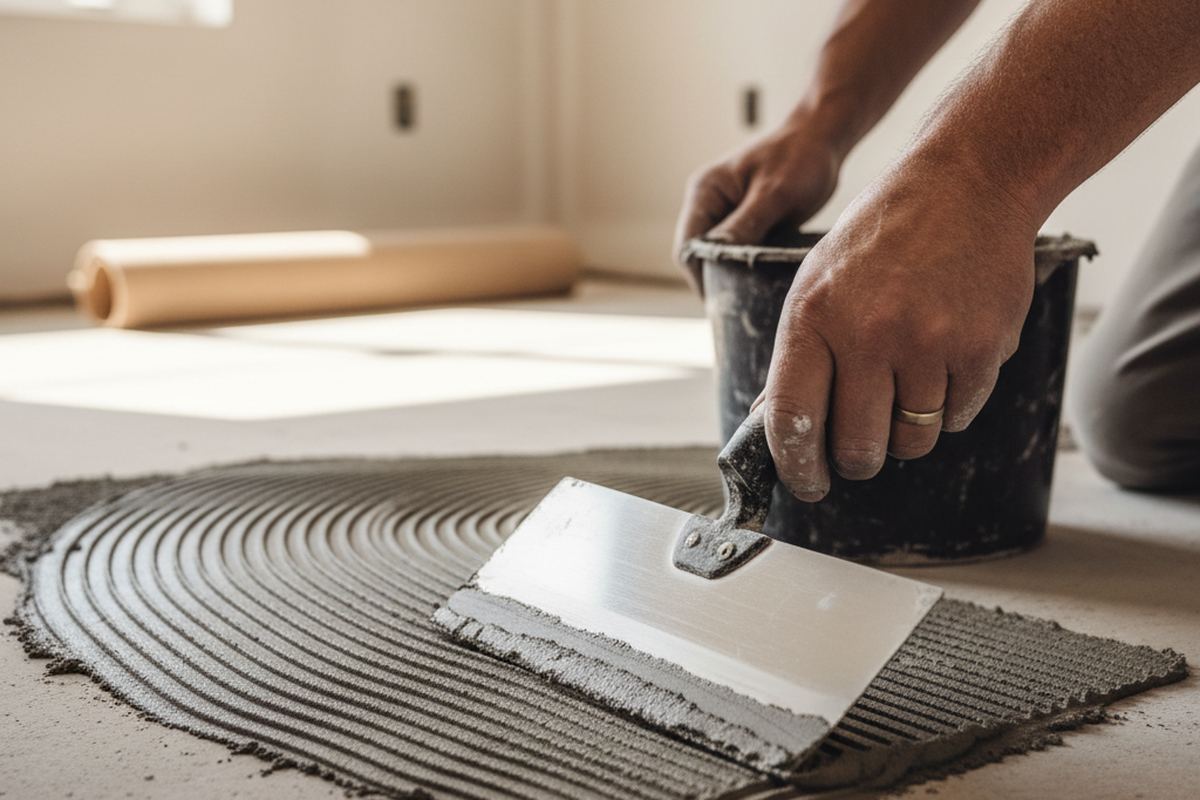
Using the Wrong Trowel Notch Size
The trowel notch size dictates the amount of mortar applied to the substrate, directly impacting the bond between the tile and the surface. A common mistake is using a trowel that's too small, which results in insufficient mortar coverage and weak spots. Conversely, too large a notch can lead to excessive mortar, making it difficult to set tiles evenly and potentially causing mortar to squeeze up through grout lines.
As a general guideline, smaller tiles (e.g., 4x4 inches) typically use a 1/4-inch square-notch trowel, while larger tiles (e.g., 12x12 inches) might require a 1/2-inch square-notch or U-notch trowel. Large format tiles (15 inches or more on one side) often benefit from a 1/2-inch U-notch or even larger to ensure at least 90% mortar coverage on the back of the tile, preventing voids that can lead to cracks.
Calculate how many tiles you need — with pattern waste, thinset, and grout coverage included.
Open the Tile CalculatorInsufficient Mortar Coverage (Voids)
A critical aspect of proper tile setting is achieving adequate mortar coverage under each tile, typically 80% for dry areas and 90-95% for wet areas or exterior applications. Many DIYers press tiles into the mortar without twisting or wiggling, which can leave air pockets or voids. These voids are weak points where tiles can crack under pressure or where moisture can accumulate, leading to mildew or tile failure.
Back-buttering—applying a thin layer of mortar to the back of the tile in addition to the substrate—is highly recommended, especially for larger tiles or uneven tile backs, to ensure maximum coverage. Periodically lifting a set tile to check for proper coverage during the installation process can prevent widespread issues later on. Listen for a solid, uniform sound when tapping on the set tile, indicating full contact.
Ignoring Expansion and Control Joints
Tiles and substrates expand and contract with temperature and humidity changes. Failing to incorporate expansion joints can lead to tiles buckling, cracking, or detaching from the substrate. These joints are typically filled with a flexible sealant rather than rigid grout and are essential around the perimeter of a tiled area, at junctions between different surfaces, and in large tiled expanses.
For smaller rooms, a 1/8-inch gap around the perimeter, covered by baseboards or trim, is usually sufficient. In larger areas, or where significant movement is expected (e.g., concrete slabs, outdoor patios), specific expansion joint locations must be planned, often every 8-12 feet. Consulting industry standards, such as those from the Tile Council of North America (TCNA), can provide specific guidance for different applications.
Rushing Grout Application and Curing
Grouting is often seen as the final, easy step, but rushing it can compromise the entire project's appearance and durability. Applying grout too soon, before the thin-set has fully cured, can cause tiles to shift. Using too much water when mixing grout weakens its strength and can lead to cracking or crumbling over time. Insufficiently packing the grout into the joints leaves gaps that can collect dirt and moisture.
After application, improper cleaning of excess grout from the tile surface can leave a hazy film that is very difficult to remove once cured. Follow the manufacturer's cure times for both thin-set and grout, which can range from 24 to 72 hours or more before light traffic and several days before full use or exposure to moisture. Proper curing ensures maximum strength and longevity of the grout lines.
Neglecting Waterproofing in Wet Areas
For bathrooms, showers, and other high-moisture environments, waterproofing is not optional; it's a critical component for preventing costly water damage and mold growth. Simply relying on cement board and grout to keep water out is a common and serious mistake. While cement board is water-resistant, it is not waterproof on its own.
A dedicated waterproofing membrane, applied either as a liquid roll-on or sheet membrane system, must be installed over the substrate in wet areas before tiling. This creates an impermeable barrier that protects the underlying structure from moisture infiltration. Overlooking this step can lead to significant structural damage, requiring extensive repairs down the line.
The bottom line
Avoiding these common mistakes can elevate your DIY tiling project from an amateur attempt to a professional-grade finish. Careful planning, meticulous preparation, and adherence to established techniques are key. Taking the time to understand each step will not only save you potential headaches but also ensure your tiled surfaces are beautiful and durable for years to come.
Get more guidance like this in your inbox
Weekly emergency-fund tactics, milestone checklists, and the next article — delivered free.
Run your own number
Get a personalized emergency fund target based on your income, expenses, and job stability.
Open the calculator